Step 1: Basic information about the process
The entire procedure of creating a new process using the wizard encompasses seven steps. The user navigates between these steps by using the Back and Next buttons.
The Back button takes you back to the previous step – please note here that the information entered in the current step is not lost.
When you click Next, the data you have entered is verified.
In the first step of the wizard you can choose between the basic (default) and advanced display mode.
Basic
The basic display mode is set by default in the first step of the wizard.
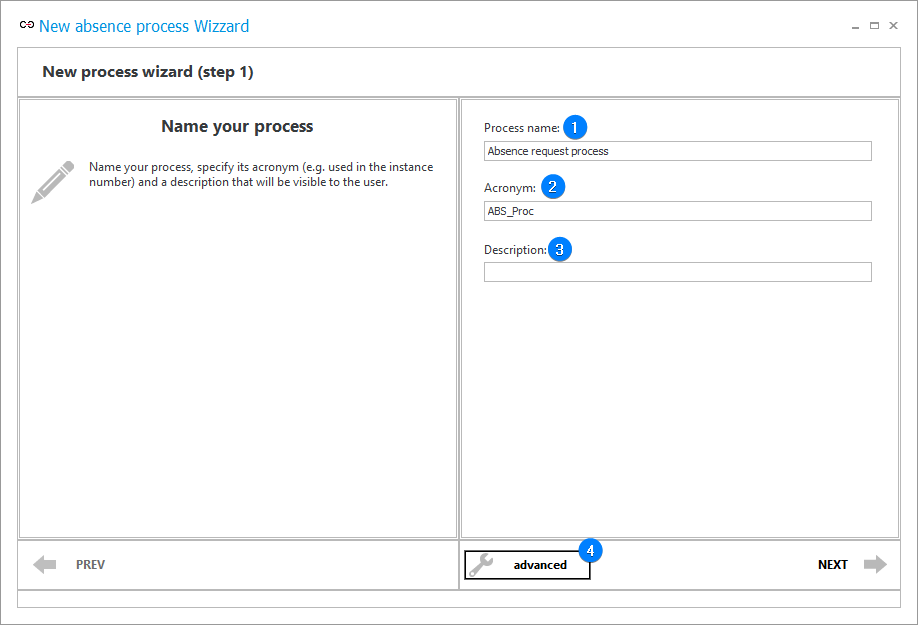
1. Process name
The name of the process should make it possible for users to define clearly the said process.
2. Acronym
The process acronym is a shortened record of the process name and it can be used for example as an element of a document signature.
3. Description
The description of the process should contain information allowing to understand the general purpose of the process and the way it operates.
4. Advanced
Some steps have advanced options. This button allows you to switch between the basic and the advanced mode.
Advanced
The advanced display mode for the first step of the process wizard is activated by clicking the advanced button located in the bottom, right corner of the wizard window.
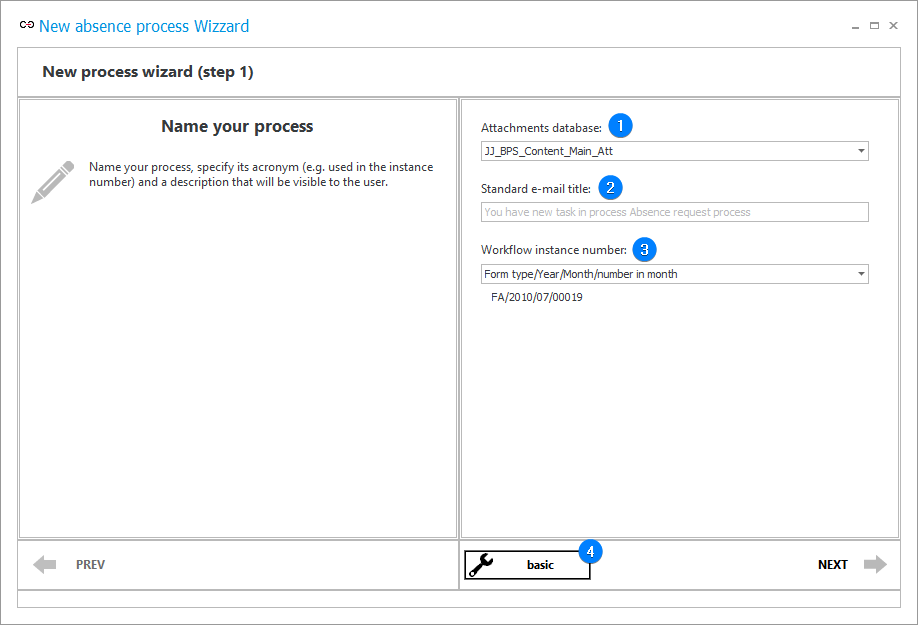
1. Attachments database
By using the drop-down list, a user can specify an attachments database used in a process that is different that the suggested default one.
2. Standard e-mail title
THe field allows users to define title of a standard e-mail message sent as a notification (e.g. regarding a task assigned to person).
3. Workflow instance number
The drop-down list allows users to select an instance number format from the available options or create their own format (the <Custom> item → the Configure button)
4. Basic
The button allows you to switch display mode to the basic one.