Manage groups
The action is used to create and remove groups in Active Directory.
In order for the action to be executed, activate the modification of objects under Active Directory Actions Configuration and configure the connection parameters for the action to be authorized.
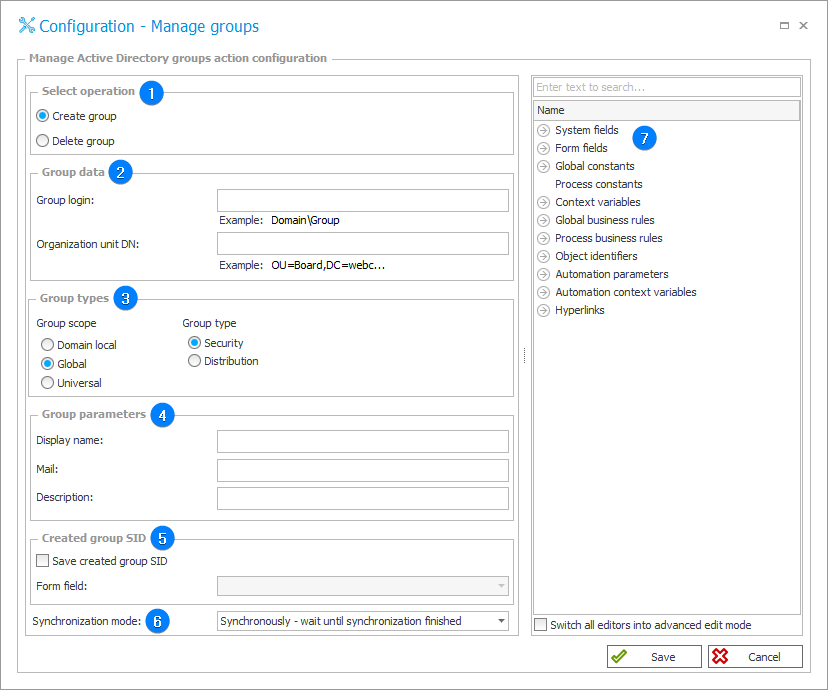
1. Select operation
Select the operation to be performed on an AD group:
- Create group,
- Delete group.
2. Group data
Data of the group in the context of which the action will be executed:
- Group login – group name, format: domain\Groupname,
- Organizational unit DN – organizational unit in which the group is created/removed, format: domain\Organizationalunitname... .
Sample parameters of an AD group:
- Group login: WEBCON\Marketing
- Organizational unit DN: OU=Board,DC=webcon,DC=en
3. Group types
Select the group scope (Domain local, Global, Universal) and type (Security, Distribution).
4. Group parameters
Define the basic parameters of the created AD group, such as Display name, E-mail, and Description.
The fields can be filled in dynamically using the Variables editor.
5. Created group SID
SID is a unique identifier of every Active Directory group and has a form of: DOMAIN\S-(ID number).
The action allows you to save SID for a new group in a chosen form field.
SID saved on a form field can be used to invoke the Manage users action.
6. Synchronization mode
After updating user or group data, it is necessary to carry out an independent synchronization operation. Data synchronization may take up to a few seconds, and the user’s data will not be available in the system until it is complete.
Available synchronization modes:
- Synchronously – wait until synchronization finished – the action will be considered complete after user data is synchronized. It is recommended to use this mode when there are sequential actions after this one that will need the updated data.
This mode will cause the user data to be added or updated outside of the transaction in which a sequence of actions are executed. If one of the sequential actions in the transaction returns an error, the withdrawal of the transaction will not cause user data changes to be reversed. Updated user data will remain in the system. - Asynchronously – do not wait until synchronization finished – the action will invoke a user synchronization but will not wait for it to complete. The synchronization will be carried out as the last operation after the transaction completes successfully. If one of the sequential actions in the transaction returns an error, the withdrawal of the transaction will also cause user data to not be entered into the system.
7. Variables editor
Dynamically generated tree containing all variables that may be used in the current location of Designer Studio. Information on how to use variables in WEBCON BPS, as well as a list of variables can be found here.