Step types
The step type determines the behavior of an instance while it is within it.
Starting step
Starting step is the first step of a workflow. A new instance is registered and its basic properties are established.
Choosing a suitable workflow path (the button at the bottom of the instance edit form) will save the instance in the database.
Intermediate step
An intermediate step is a universal step of the workflow. It should be used when no specific properties of other steps are necessary. It represents some sort of task or procedure that a user must complete before manually advancing the workflow instance to a further step.
System step
The system step has the following properties:
- Tasks in this step are not finished even if the “Finish all users' tasks” Admin operation is used.
- Tasks in this step carry over to the next step. Any assignments made when exiting this step will be added to the ones carried over to the next step.
- Standard e-mails are not sent after leaving this step.
- If the next step is a system step, no user needs to be assigned on the path (it is possible for no one to be assigned on a system step).
For more information about system steps see System steps - how do they work.
Individual system steps have additional properties pertaining to their intended function:
Waiting for scan
When the workflow service Folder monitoring role encounters a file, it processes the file's barcode. Upon correctly recognizing a barcode associated with an instance, the file is attached to the corresponding workflow instance. If such an instance happens to be in this Waiting for scan step at that moment, it is automatically moved to the next step along its default path.
This step is used in scenarios where a workflow instance needs to have some original document attached (e.g. for some invoice acceptance process which cannot proceed without this document). This is the most common use case – adding this step to the workflow to serve as a stop-gap for when document scans are expected. The instance will automatically go to the next step when the workflow service processes the scanned file.
Wait for text layer/OCR AI/OCR AI Learn
This is where the workflow instances stay while their attachments await processing in one of the attachment processing queues (Text Layer Queue, OCR AI Recognition Queue, OCR AI Learn Queue).
Each of these steps should have a corresponding action defined on the path leading to it (NOTE: this action’s trigger cannot be On entry).
Workflow instances will remain in this step until all attachments belonging to them are processed.
Wait for sub-workflows
This step is responsible for the communication between the parent workflow and its sub-workflows. The parent workflow will wait and respond to status changes in its subworkflows.
The parent instance will leave this step using one of the available paths depending on the status of its subworkflows. The path that is chosen can be determined based on one of the predefined scenarios, or completely custom based on a SQL query.
When the step type is set to Wait for sub-workflows the workflow editor for this step will now have the Subworkflows settings tab available.
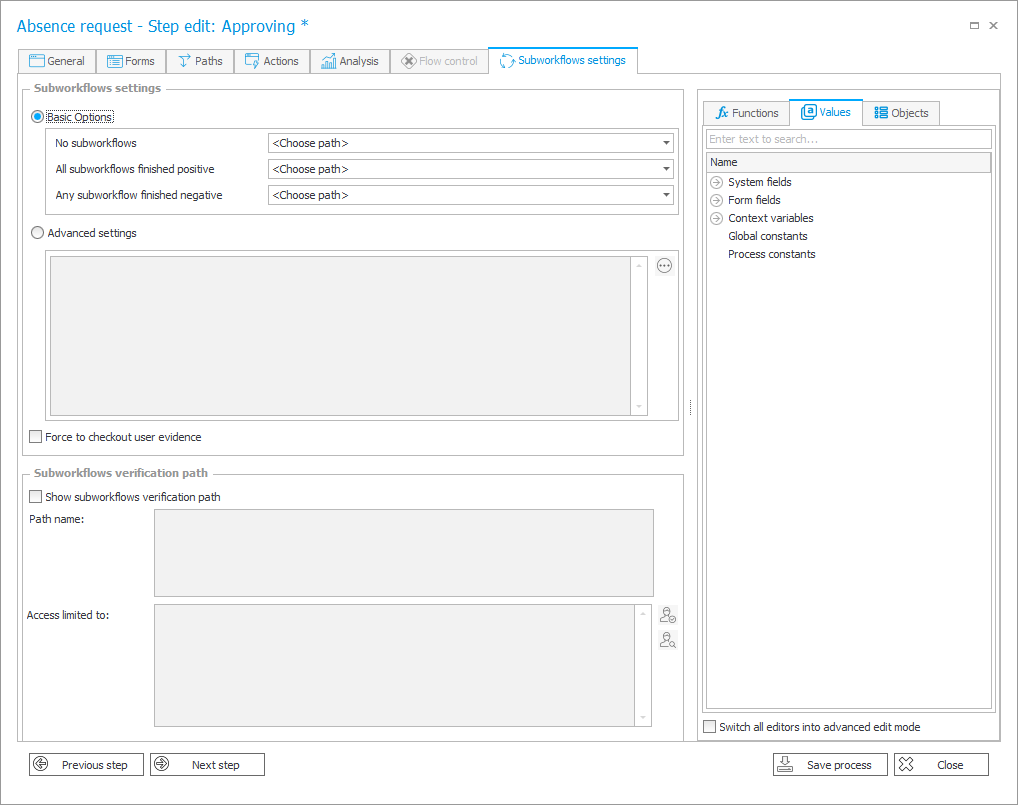
Here, define which path the workflow instance will take when one of the three conditions is met:
- No subworkflows,
- All subworkflows finished positive,
- Any subworkflow finished negative.
You can also define the path dynamically. Select Use advanced settings and create a suitable SQL query.
The Waiting for subworkflows step can also Show the subworkflows verification path on the form. If you click the button of such a path, the instance is moved to the step defined in its configuration. You can limit the access to this path to a particular group of people and define its name.
Workflow control step
The workflow control step is a step used for automatic path selection based on the conditions defined in the step's configuration. The path is chosen based on a Business rule or SDK in the Flow Control tab.
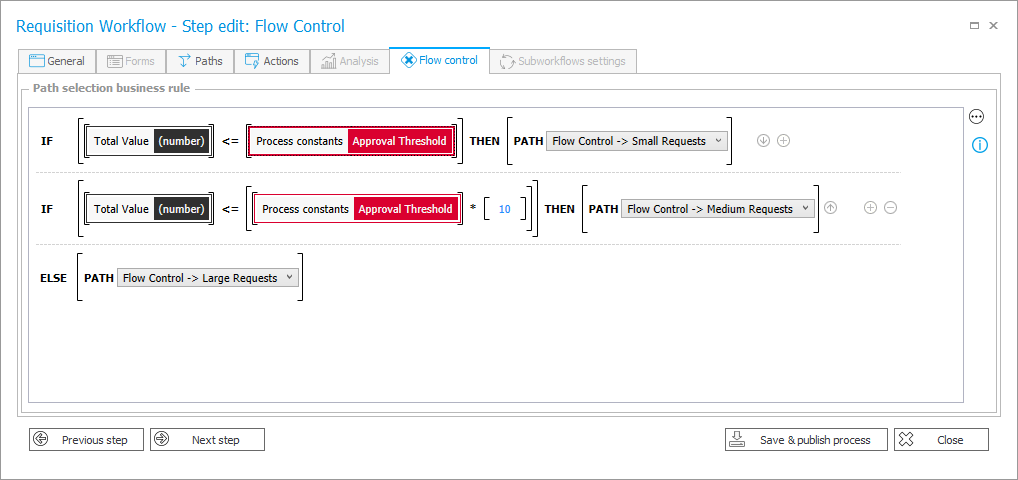
The business rule should return the identifier of a transition path which will be used to move to the next step. It is recommended to use the PATH function in the construction of the rule. If no business rule is defined, the default path will be chosen.
An example of a business rule that involves IF THEN and PATH functions:
IF [ [Total value (number)] < [1000] ] THEN [ PATH [Save] ]
IF [ [Total value (number)] = [1000]] THEN [ PATH [Accept] ]
ELSE [ PATH [Reject] ]
Find out more about the workflow control step in the community article.
Final step
The final step is the final stage of a workflow. It represents the business process arriving at a logical conclusion, with all its necessary stages completed.
This step type has two properties:
- No tasks need to be assigned to people when in this step,
- The instance's status will be updated automatically upon step entry (finished positively or negatively). As a result, if the instance has a parent instance that is located in the Wait for sub-workflows step, the sub-workflow verification will be launched on this parent instance. More information about how to launch and control subworkflows can be found here.
There are two types of end steps that can represent different outcomes of the workflow:
- Final (positive) – represents a successful resolution, on entering this step the instance changes its status to Completed successfully,
- Final (negative) – represents an unsuccessful resolution, on entering this step the instance changes its status to Completed unsuccessfully.
The instance status may be useful for reporting, and is used for determining the outcome of the Wait for sub-workflows system step.