User profile
The user profile is found in the top right corner of the Portal interface. To open the menu, click on the profile picture.
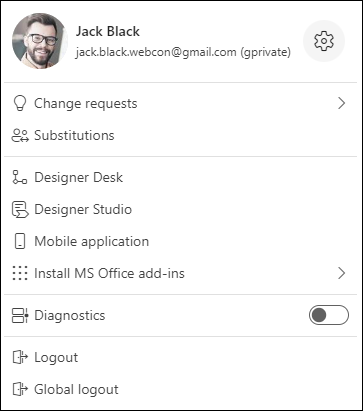
The visibility of the Logout and Global logout buttons at the bottom are controlled in the System settings under Security. By default, only the Logout button is shown, which allows you to log out of the current session. It is possible to add a second button that logs out from all devices. You can also replace the default button with one that logs out from all sessions.
For more information, read THIS ARTICLE on our technical blog.
The menu contains the Profile settings where you can adjust the language and the color theme of the Portal interface, as well as notification and security preferences.
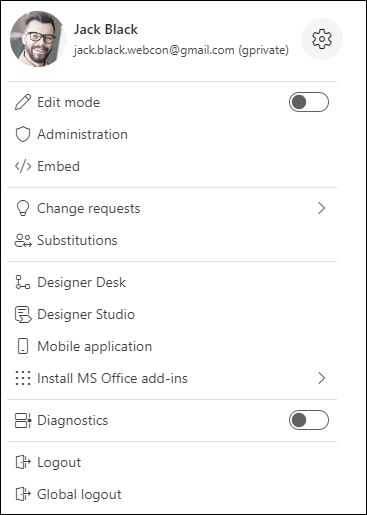
The menu also contains various features of the platform. You will see features based on your privileges. For example, all users can download Office Add-Ins and set up substitutions, whereas features like Designer Desk or Administration will require appropriate privileges.
Profile settings

Clicking the cog icon will open the Edit profile window.
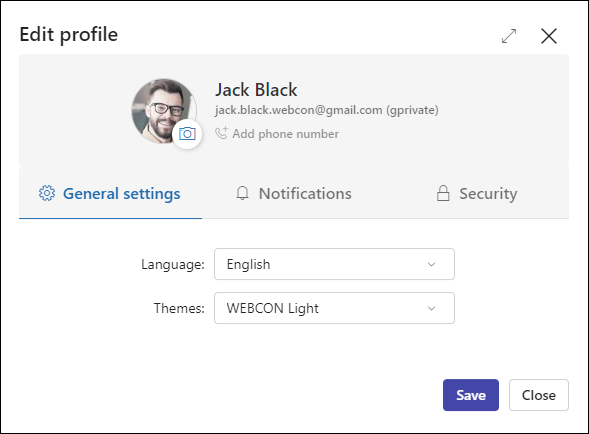
In the top part of the window, you can set up a profile picture as well as phone number used for authorization via SMS. The rest of the window is divided into 3 tabs:
General settings
Contains language options and color theme selection. The available languages depend on the Language packs uploaded to the system. Color themes can be edited in the Admin panel.
Notifications
Contains preferences regarding Mass notifications and PUSH notifications.
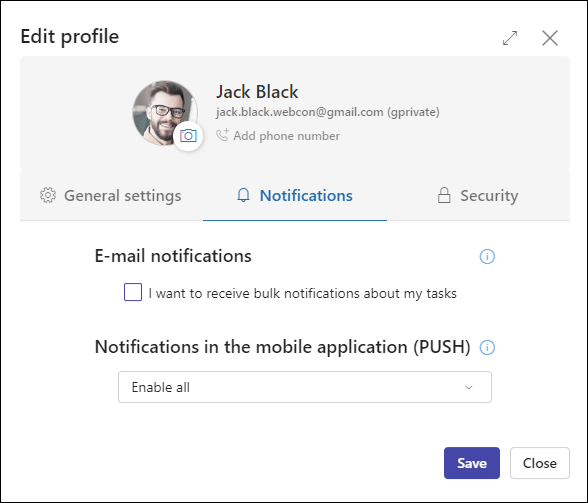
You can opt out of Mass notifications sent by the system. This has no effect on other notifications about tasks, or notifications sent by Actions.
For PUSH notifications, you can choose which Applications you wish to receive notifications from.
This has no effect on authorization based on PUSH notifications – you will receive these notifications regardless of the option chosen.
Security
To use the mobile app for additional authorization, you must install the mobile app and add your device as a Trusted device.
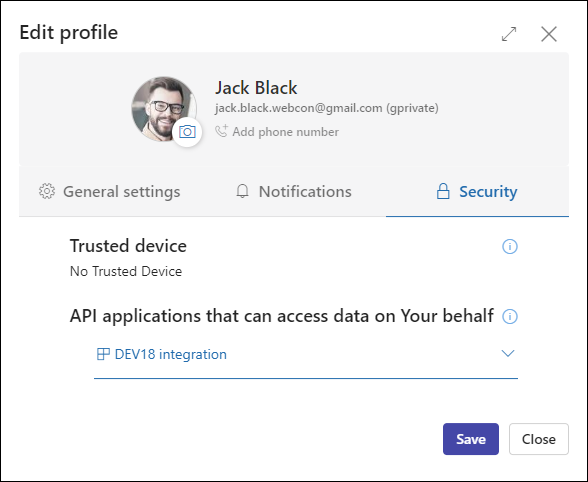
It also displays a list of applications that are allowed to access selected data in your WEBCON BPS account. They have access to the WEBCON BPS API in selected areas and can perform operations on your behalf. You can revoke access for applications you no longer trust or use.
User menu
User menu in Portal provides access to the following functionalities:
- Change requests – require activation in the System settings in Designer Studio,
- Substitutions – additional options and modes can be toggled in the Process settings,
- Administration – available only to admins,
- Designer Desk – requires a license to be assigned in the System settings,
- Designer Studio – allows you to launch the associated Designer Studio remotely (a symmetrical connection with a transfer of at least 100Mb/s is recommended),
- Mobile application – QR code to install the mobile application. If the app is already installed, the QR code can be used for instant setup,
- MS Office add-ins – option allows you to download the installation/manifest files for Outlook Classic, Outlook Modern, Word Classic, Word Modern, and Teams add-ins.
Diagnostics
The option Diagnostics allows users to log all invocations coming from Portal.
If the icon in the top menu flashes a red light, it indicates that diagnostics mode is currently enabled and a diagnostic session is in progress.
During this session, all events performed in Portal on a given browser tab are recorded until the session is saved. This is done to identify potential malfunctions in the system and record related information to aid in future troubleshooting.
Clicking the icon as it flashes or selecting the Show diagnostics option from the user menu will open the Logger View window that displays a list of events recorded during the diagnostic session.
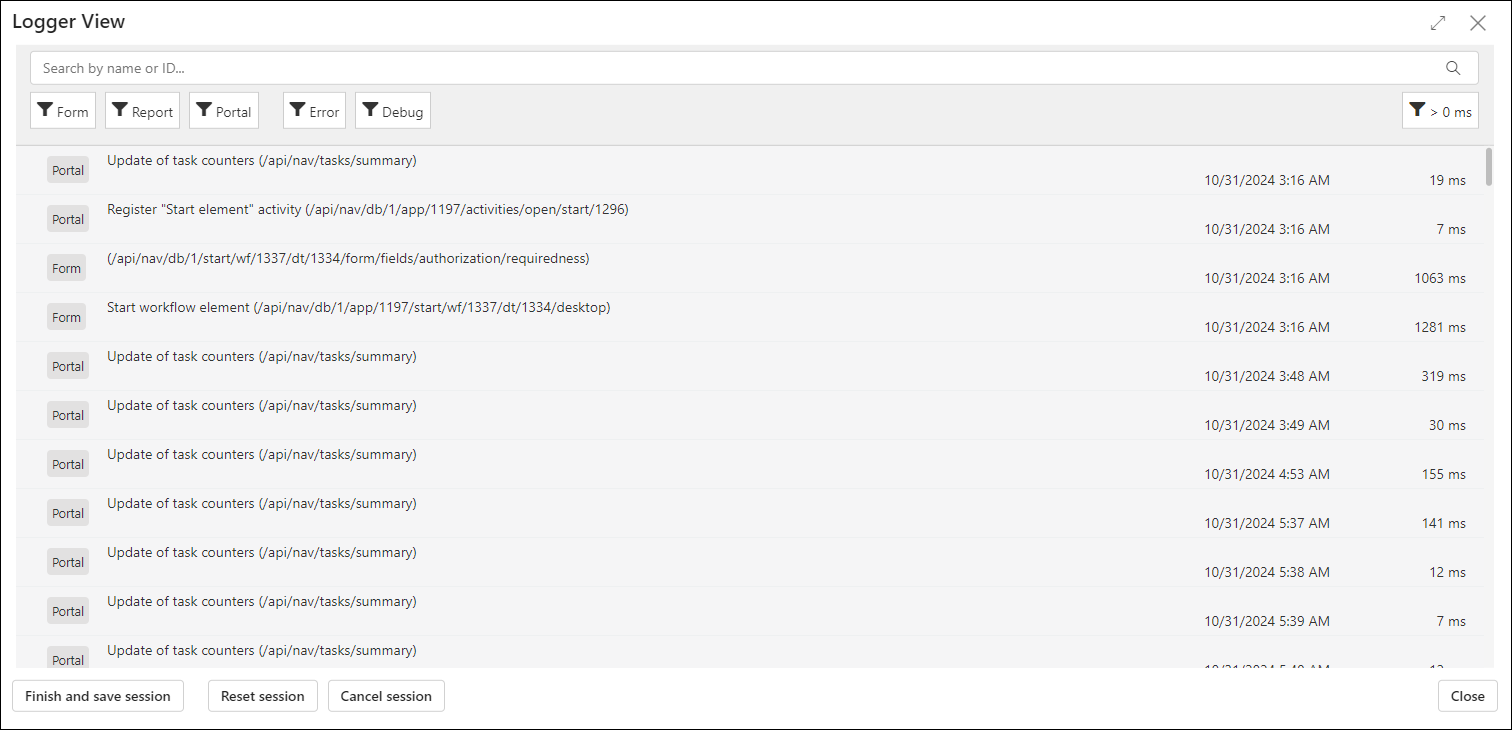
The list can be narrowed down by using the appropriate filters. At the bottom of the window, there are buttons that allow you to finish and save, reset, or cancel the session. Once the session is over, a link with the results will be generated, which can then be forwarded to the system administrator for further analysis.
For a detailed description of the functionality, read the article Diagnostics and form behavior registration mechanism on our technical blog.