Send custom email
The action of sending an email in which you can freely configure recipients, subject, and content.
The action configuration window is divided into 5 tabs:
Recipients
The tab allows you to indicate the email recipients.
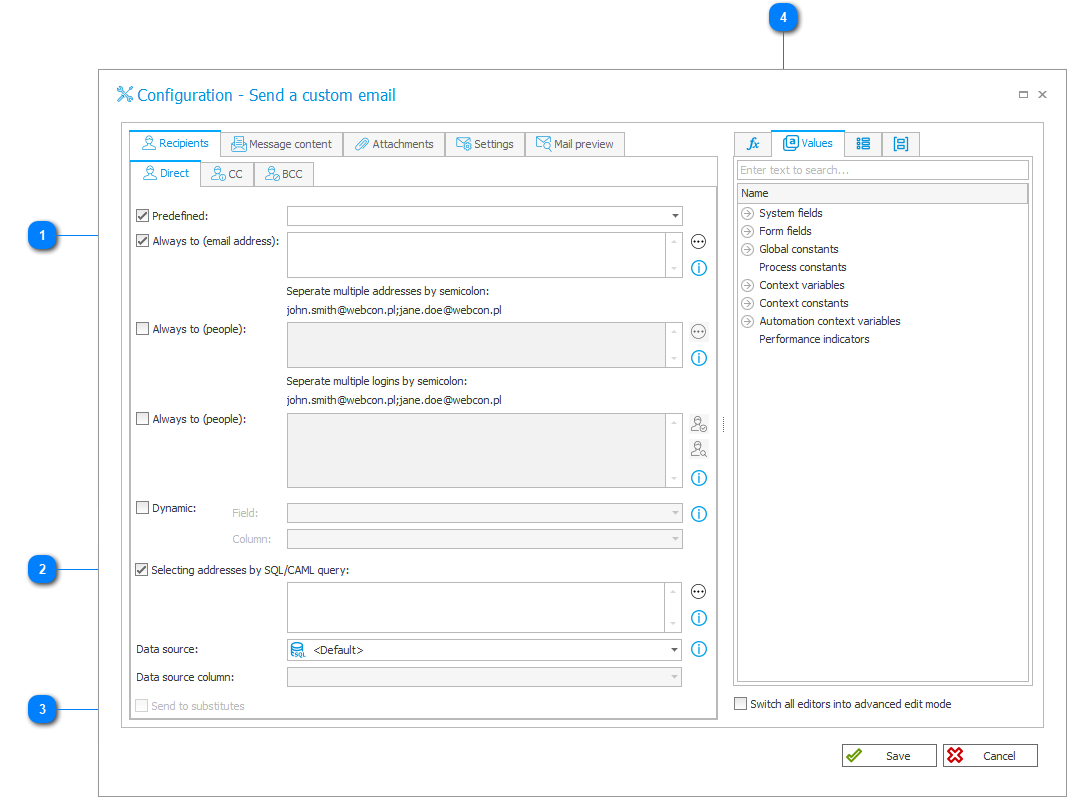
1. Recipient settings
-
Predefined
Users working with an instance can be designated as email recipients:- Author – author of the workflow instance,
- Assigned people – users with existing tasks on the workflow instance,
- Assigned CC task people – users with existing CC tasks on the workflow instance,
- All assigned people – all users who have been assigned the existing tasks on the workflow instance (either directly or via CC).
-
Always to (email address)
Individual email addresses of recipients, separated by semicolons. The message will be sent to each e-mail address provided. -
Always to (people)
Individual domain users. User logins must be provided in UPN or NetBIOS format. Using the provided logins, the action will load the corresponding emails for these users found in the BPS users list (Email column). -
Always to (people) [with search window]
Individual domain users. The search window button on the right may be used to help find logins / groups of logins. Using the provided logins, the action will load the corresponding emails for these users found in the BPS users list (Email column). -
Dynamic
Addresses obtained from a form field or from the Item list. This configuration will accept a valid user login. Using the provided login, the action will load the corresponding email for this user found in the BPS users list (Email column).
2. Selecting addresses by SQL/CAML query
List of recipients defined by the query.
The query should return "login" or "login#name" in the first column. Multiple users can be returned separated by semicolons or in new rows.
Use the dynamic Variables editor to help build a query.
This configuration will accept a valid user login. Using the provided login, the action will load the corresponding email for this user found in the BPS users list (Email column).
3. Send to substitutes
If a recipient is being substituted by another user, that user will receive the message as well.
4. Variables editor
Dynamically generated tree containing all variables that may be used in the current location of Designer Studio. Information on how to use variables in WEBCON BPS, as well as a list of variables can be found here.
Message content
The tab allows you to define the content of the e-mail message.
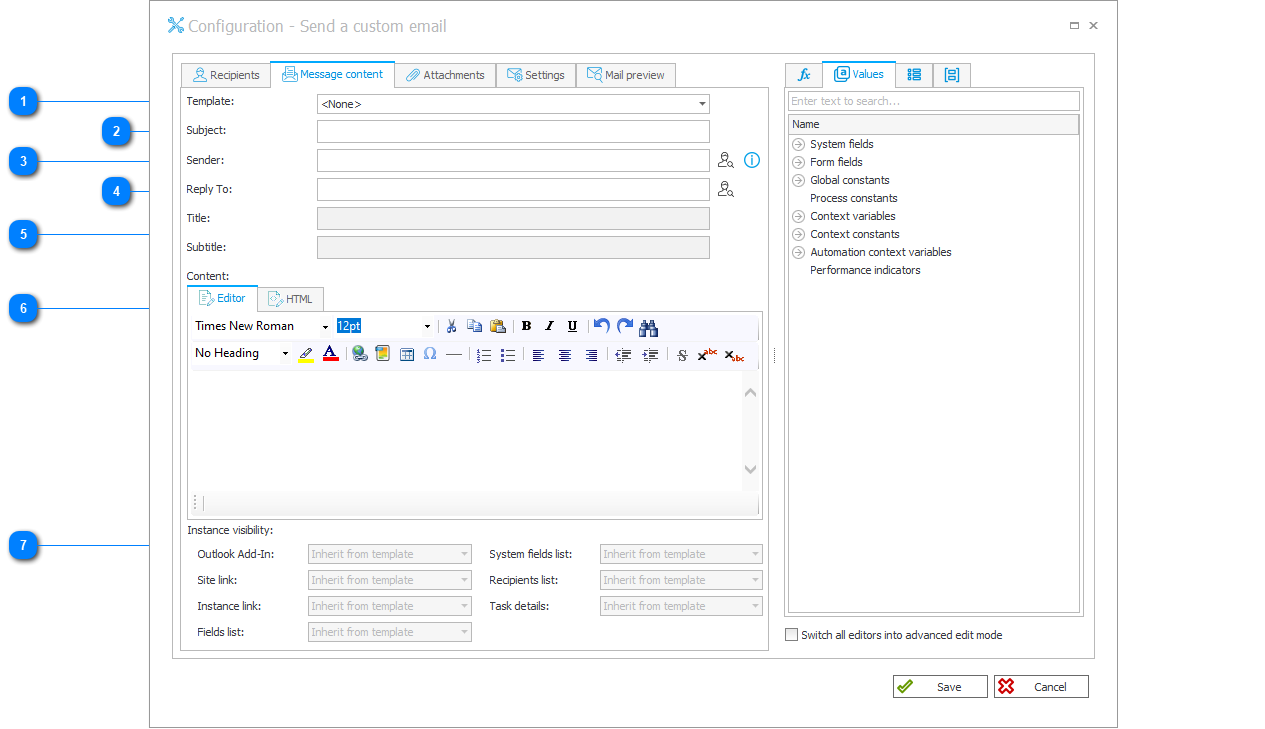
1. Template
Select a predefined email template or use the default template.
2. Subject
Defines the topic of the message.
3. Sender
Email address (e.g. john.smith(at)webcon.com) or name and email address (e.g. John Smith <john.smith(at)webcon.com>) that will be displayed as the sender of the message.
The generator next to the field may be used to generate a display name.
If the field is left empty, sender's name defined in the template will be used. If the template is also empty, the Standard email sender address will be used.
If the Allow "Send As" option is checked in the Configuration of sending emails, an e-mail account provided in this parameter is used to send emails.
If, despite checking the Allow to overwrite sender option, the parameter remains blank, emails are sent using an account entered as Sender in the configuration of the selected email template or – when the Sender in the template is also blank – an account entered in the global Configuration of sending emails.
The account address must be entered in the following format: john.smith(at)webcon.com.
The value entered as Displayed name will be ignored.
The Send as authorizations must be configured for an account used for sending emails.
For more information, see THIS ARTICLE on our technical blog.
4. Reply to
Replies to the message will be sent to the address specified here. Formatted identically to the Sender field above.
5. Title and subtitle
Define a main title and subtitle for the message header.
6. Content
Allows you to define the content of an email message using the Editor. It is also possible to define the message content in HTML.
7. Instance visibility
This section defines which instances will be visible in the message. They can be either:
- Visible,
- Hidden,
- By template.
Attachments
The tab allows you to configure the settings for sending in emails attachments added to a workflow instance.
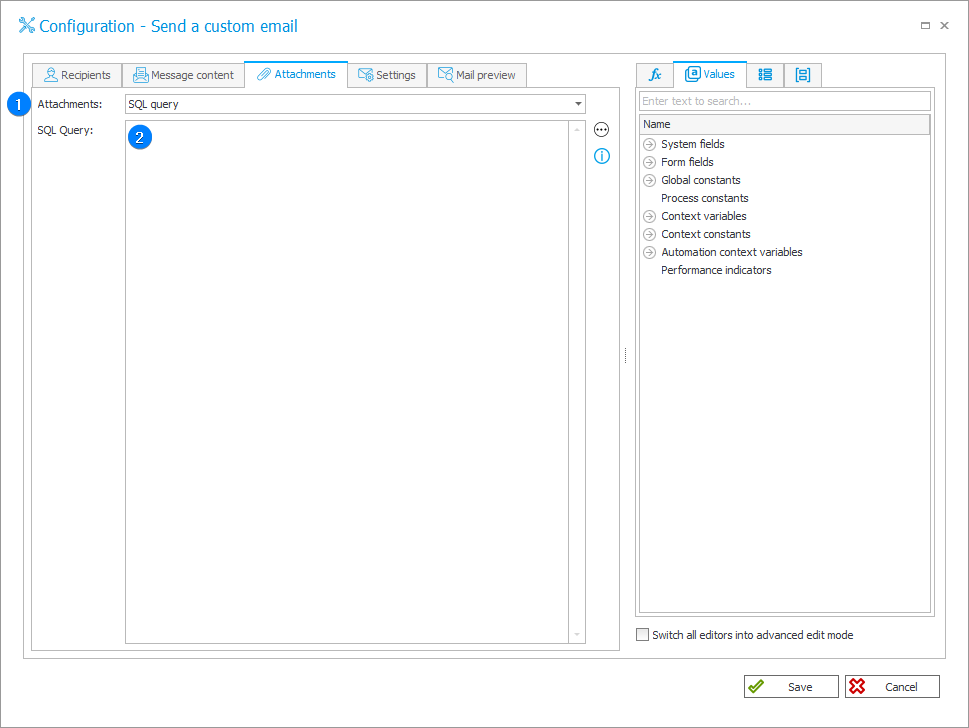
1. Attachments
Defines which attachments will be sent with the message. Available modes:
- Do not send – none of the attachments belonging to the workflow instance will be added to the message.
- Send all – all attachments belonging to the workflow instance will be added to the message.
- Send last – only the most recently added attachment to the workflow instance will be added to the message.
- SQL query – attachments will be added to the message based on an SQL query.
2. SQL query
The query should return the attachment IDs corresponding to the IDs in the "WFDataAttachments" table.
IDs should be returned in a column named “ATT_ID” or “ID”.
Settings
The tab allows you to configure additional settings for sending email notifications.
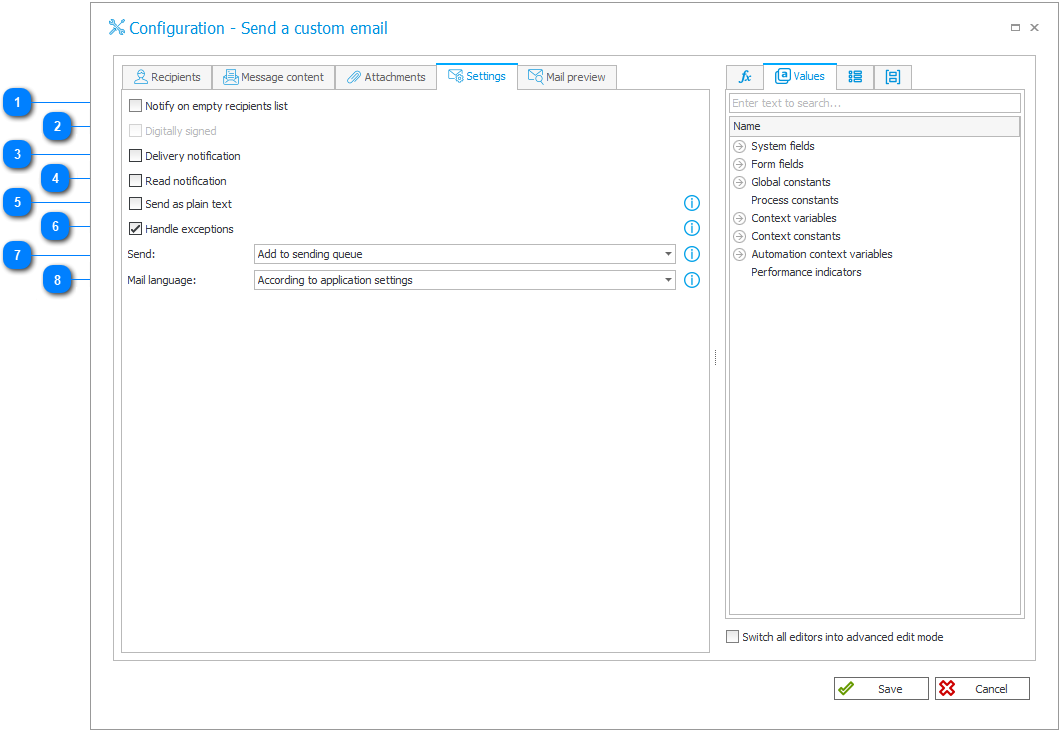
1. Notify on empty recipients list
If there are no valid recipients to receive the message, the system will display a error.
2. Digitally signed
Adds a digital signature (digital certificate) to the message.
3. Delivery notification
Sends back a confirmation after the recipient receives the message.
4. Read notification
Sends back a conformation after the recipient reads the message.
5. Send as plain text
Specifies whether the email should be sent as plain text. In this mode, the "Mail Approval" section will be skipped.
6. Handle exceptions
Takes into account the Exceptions section defined in Email notifications. Messages will not be sent to the persons indicated.
7. Send
This parameter defines how the email will be sent by the system:
- Wait for sending confirmation – the automation will be finished successfully once a connection with the sending server is established correctly and it receives the request to send an email to the specified address. This is not a confirmation that the recipient received the email.
This configuration significantly extends the action execution time and system response time for the end user.
- Add to sending queue – the email will be added to the sending queue after the entire automation is completed flawlessly. The email will be sent when it reaches the first spot in the queue. If there is an issue with sending the email, it will not affect the outcome of the automation.
8. Mail language
You can choose email notification language. The numbers and dates will be configured accordingly to the language you have chosen.
If some translations are missing for the language you have chosen, the untranslated text will be displayed in the configuration language. If you choose the According to application settings option, email notification language will be the same as the configuration language.
Note that when you select a language for email notifications, it will display them in this language regardless of language settings of your application.
Detailed information on the Mail language is available in the article Email notifications in a multilingual environment on our technical blog.
:::
Preview
In this tab you can check how the configured email notification looks like.
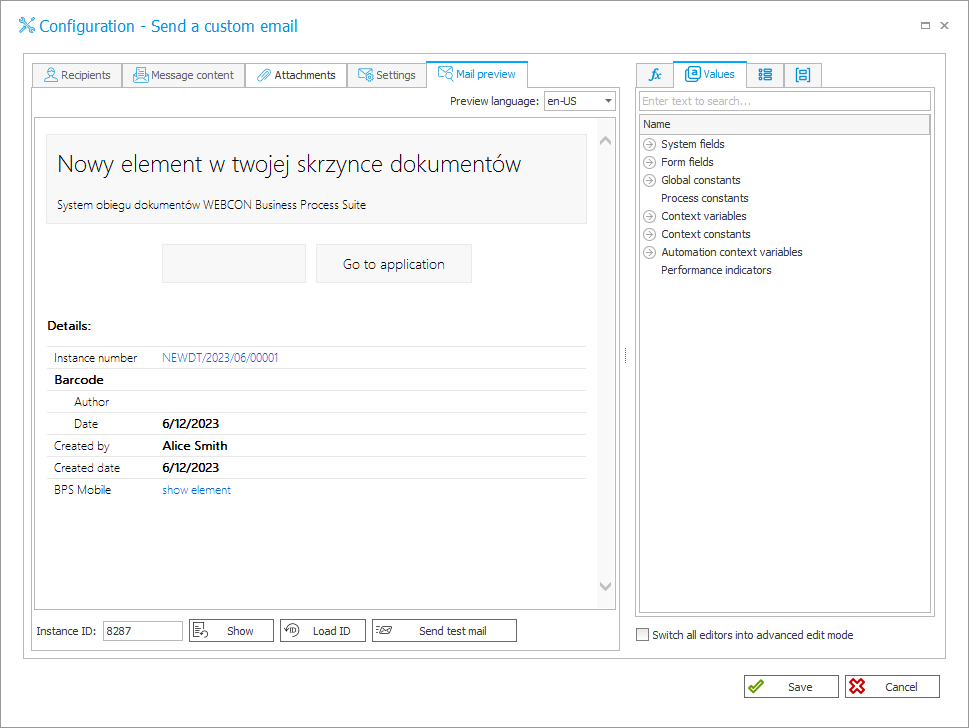
Additional options:
- Show – preview an email generated for the entered Instance ID.
- Load ID – when this button is selected, the the ID of the last workflow instance created in the current process will be loaded.
- Send test mail – a confirmation window will appear. Enter a valid address to send a test email.
The action is executed in "Pending in transaction" mode, i.e. its execution is postponed until the transaction is completed.
For more information, see THIS ARTICLE on our technical blog.