Main menu
The add-in main window is divided into four tabs: New, Tasks, Browse, and Search.

New
The tab allows you to create shortcuts to selected workflows and start new workflows in WEBCON BPS based on an email message.
To add a new shortcut, click on the plus icon located in the Add field. The tile configuration window will open:
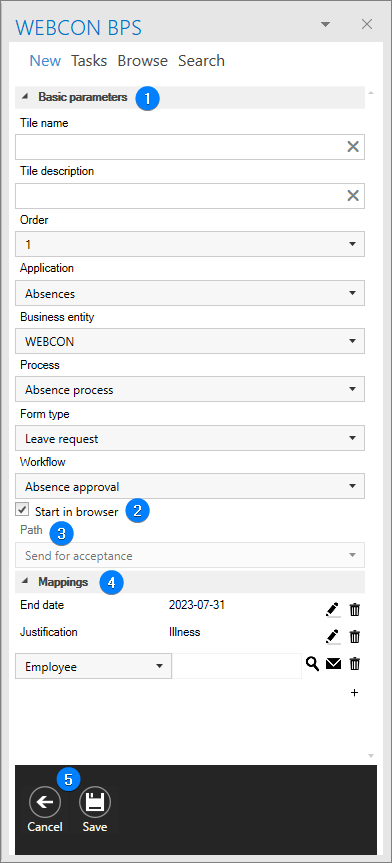
1. Basic parameters
Here you need to fill in the basic information, such Name, Description and Order of the tile (shortcut) displayed in MS Outlook, as well as data from WEBCON BPS, i.e. Application in which the process will be started, Business entity, selected Process, Form type and Workflow to be started in the process.
- If the Tile name field is not filled in, the program will automatically fill it in with the process name. On the other hand, if the Tile description field is not filled in, the program will automatically fill it in with the process name, form type name and workflow name.
- Only processes that have the Available via WEBCON BPS for Microsoft Outlook Add-In option checked in the process settings will be visible. To be able to start a process, the user must be authorized to do so. If no process has this option checked, or the user does not have the appropriate permissions, the list of processes will be empty or it will be impossible to start the process.
- If processes/applications are available in several language versions, their names will be displayed in the add-in's drop-down list in the language currently selected in the profile settings in Portal.
2. Start in browser
If you check this parameter and use the tile, the configured process will start in the default browser.
3. Path
An option available only if the Start in browser box is unchecked. Paths will be selected from the paths defined on the first step of the selected workflow.
4. Mappings
This section allows you to fill in the form fields with fixed, defined values. Here you can also use data available directly in the email message, such as sender, content, etc.
5. Cancel/Save
With these options, you can discard the changes you have made, which will take you back to the previous step, or save the configured tile (as long as you have completed all the required fields of the tile).
Tasks
All tasks assigned to the current logged-in user are displayed in the form of a search tree. It allows you to browse specific instances assigned to the user in the selected processes.

1. My tasks
Displays the number of tasks assigned to the logged-in user. After clicking on this option, the names of applications in which the logged-in user has assigned tasks are displayed. Subsequent selections (process, workflow, workflow instance) lead to the display of the task content (form).
2. CC tasks
Allows you to go to specific CC tasks assigned to the logged-in user.
Browse
The tab allows you to browse the archive of documents on the server to which the user is logged in, and define a customized structure for searching the archive.
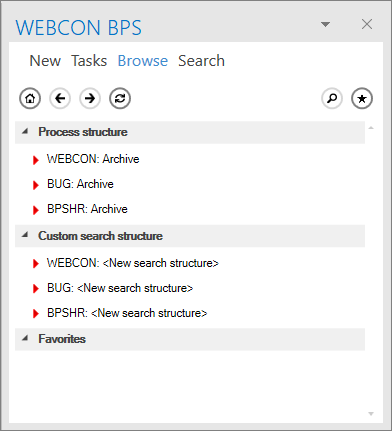
You can search for items according to Process structure or define Custom search structure and thus decide how you will browse the document repository. For example, first select the type of document, then the year it was created, then the counterparty to which the document was linked, in order to finally indicate the step of the document and display the resulting list of instances.
It is also possible to save Favorite places in the repository, such as a list of all contracts that are currently in the negotiation step, or all invoices related to a selected counterparty and placed in the archive.
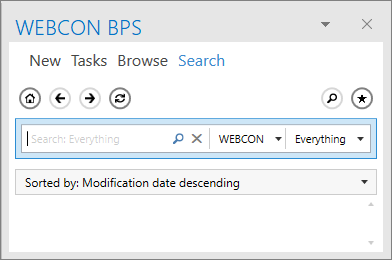
Search
Switching to this tab will bring up a search engine in the add-in's window, which allows you to check the availability of specific tasks and documents. Here, you can also select the criteria by which your search results will be sorted.
Other
It works similarly to the Add tile, except that it is used for quick-starting workflow instances, without the ability to save the tile.
For more information on how to use the add-in, see THIS ARTICLE on our technical blog.