Application home
Application is a visualization layer which serves as the user's workspace. It groups processes that are related to each other. This is where the start buttons, reports and dashboards are placed. Access to applications requires defining permissions for users, regardless of process and data privileges.
Each application has its own page also known as the dashboard. To access the application page, you may search for the application in the Choose application section, click on the corresponding tile in the Frequently used applications section, or select it from the Available applications list on the Portal home page.
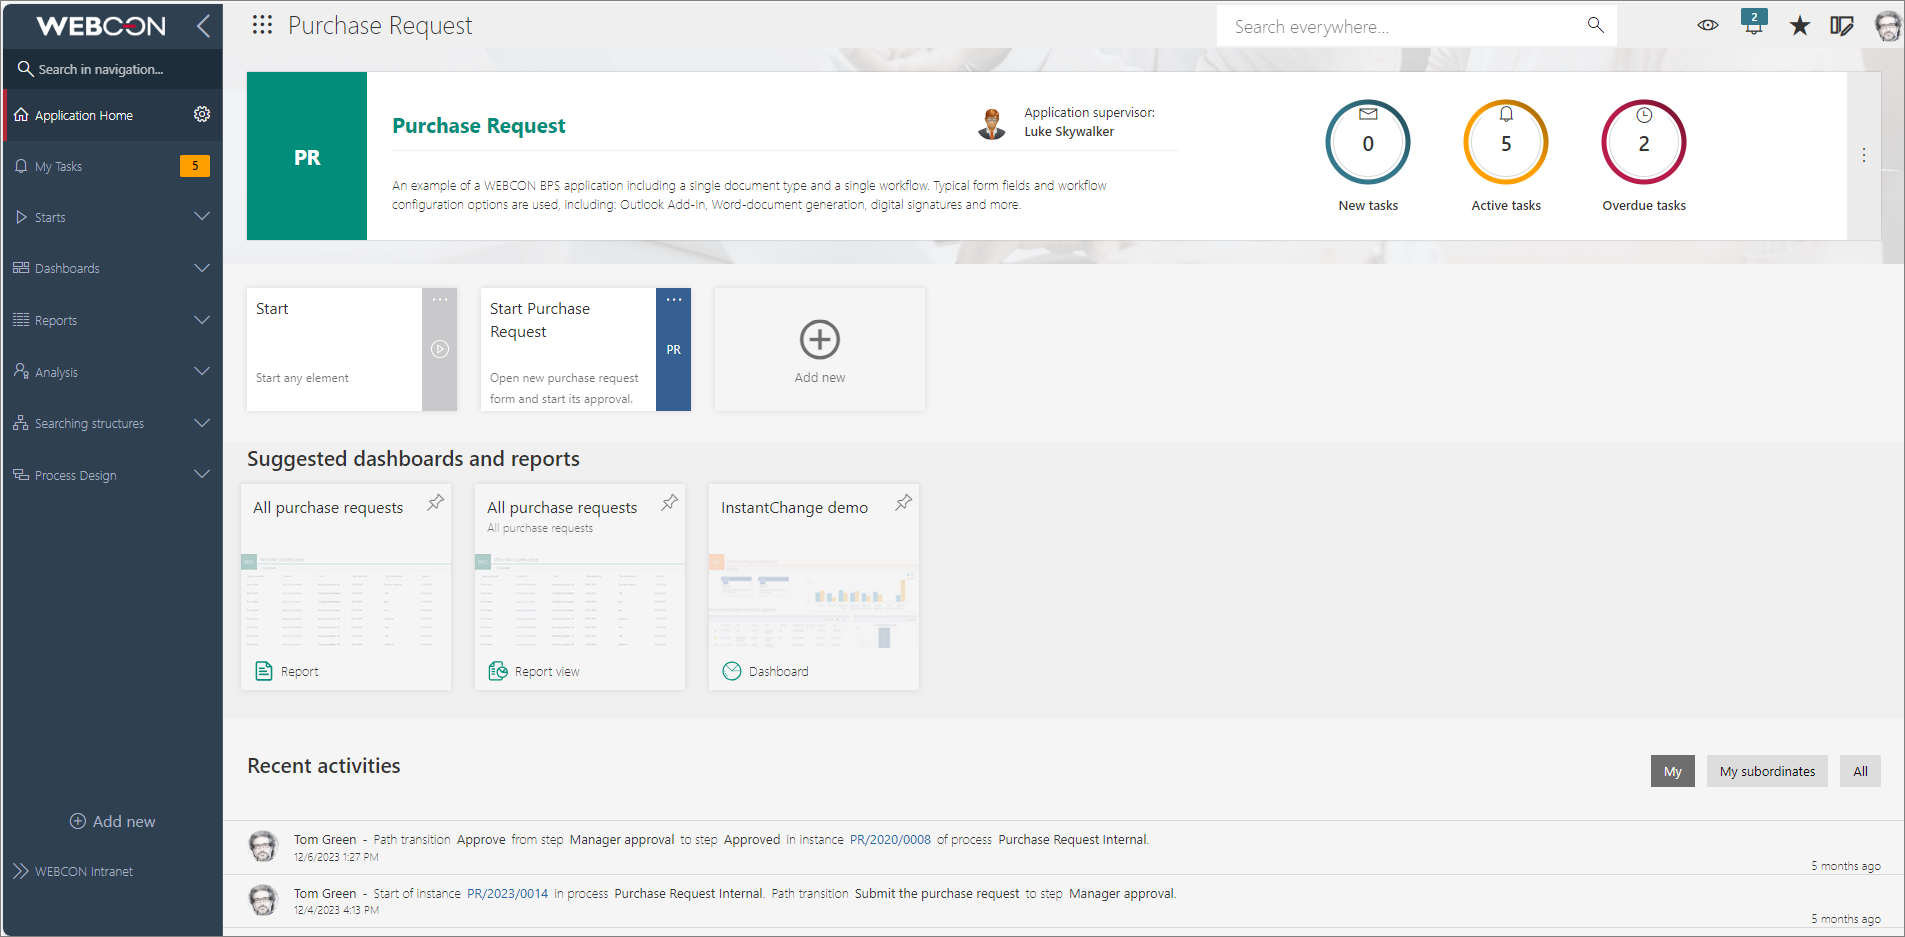
Application panel
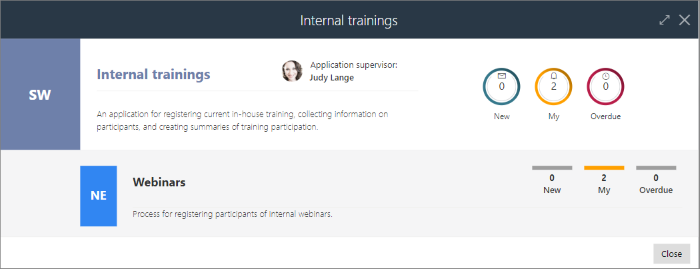
The application panel is a highlight of the application. It contains essential identifying information, such as the Name, Abbreviation, and Description, as well as the data of the Application supervisor, i.e. the person who created and manages the application. Additionally, it includes task counters whose values are presented in the context of the currently logged-in user.

The panel also features an ellipsis icon, which, when clicked, will display a menu containing the following options:
- Go to application – allows you to navigate to the application. This option is also available on the application panels on the Portal home page,
- Start new – allows you to start a new workflow instance within the current application,
- More information – when you click on this option, a list of the processes creating it will be displayed.
Application privileges
An application can be accessed and used by users who have been granted the appropriate privileges. The largest range of privileges (right after the system administrator) is held by the Application administrator, who can freely modify the application, add and change its processes, presentation elements, etc.
Detailed information on this topic is available in the Privileges section of the Designer Studio chapter.
Starts
Start buttons are presentation elements that allow users to manually start a new workflow instance.

Clicking on the button opens the Start element window, where you can specify the context in which the new instance will be created, including the company, process, form type, and workflow. Once the Start button is selected, you will be taken directly to the form on the first step of the indicated workflow. The Start element window can also be accessed by expanding the Start node in the navigation menu and selecting one of the defined buttons.

Start buttons can be created in Designer Studio or directly on the Portal page. To add a button on the application page, enable Edit mode. You will then see an empty Add new button. When you click on it, the start button configuration window will open.
For detailed instructions on creating and configuring start buttons in both Designer Studio and Portal, see THIS ARTICLE on our technical blog.
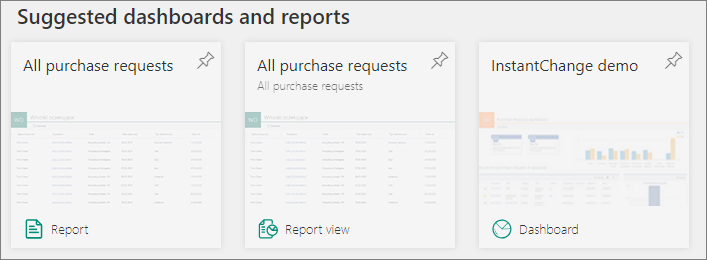
Suggested dashboards and reports
This is a list of Dashboards, Reports, and Report views in the application, created based on user behavior analysis. The suggested presentation elements are displayed according to frequency of use (in descending order), but you can move an element to the top of the list (pin it) by clicking on the pin icon in its upper right corner.
Recent activities
The section displays information about users' activity in the application, i.e. their work with workflow instances. The list of recent activities contains a maximum of 15 items, with each item including the following information:
- the user who performed the operation,
- the type of activity (e.g. starting an instance, going through a path, saving an instance),
- path name, instance number (when you click on it, a preview of the workflow instance is displayed),
- process name, step names,
- approximate elapsed time of the activity (expressed in minutes, hours, days, etc.),
- the exact date and time of the activity.
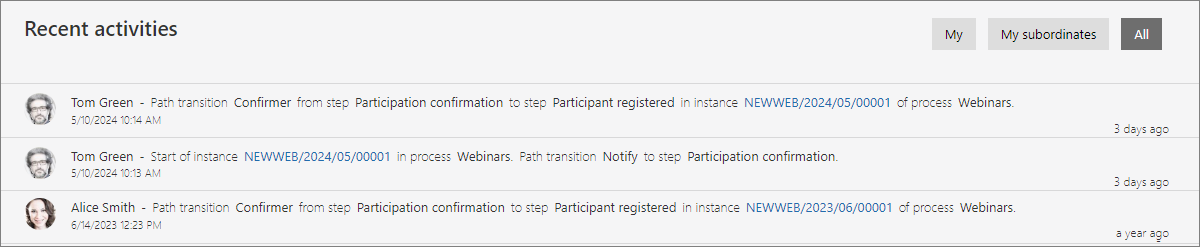
In addition, the list of recent activities in the application can be narrowed down using the following filters:
- My – only activities of the logged-in user are displayed,
- My subordinates – displays the activities of the logged-in user's subordinates are displayed. If the user has no subordinates, “No data” will be displayed,
- All – displays all recent user activity in the application.
Additional options
As long as the logged-in user has the appropriate privileges, they can access additional functionalities.
On the application page, the icon ![]() is available in the top menu, with the option: Enable edit mode and Embed under it.
is available in the top menu, with the option: Enable edit mode and Embed under it.
Enable edit mode
When this option is selected, the page enters edit mode. Among the items available under the aforementioned icon, there is now an option to manage translations and an option to add new presentation elements: start buttons, dashboards, and report views.

In edit mode, the same window is accessible by pressing the Add new button that appeared on the Side panel. A blank Add new tile is displayed among the start buttons, allowing you to configure a new start button for instances.
Additionally, on the side panel, a cogwheel icon appears next to the Application page node. Clicking on it displays a Choose application home window, where you can choose the default application dashboard.

In addition, in edit mode, the Process Design node appears on the side panel, enabling users to make partial edits to application processes in Portal.
Exit edit mode by selecting the Disable edit mode button in the top menu.
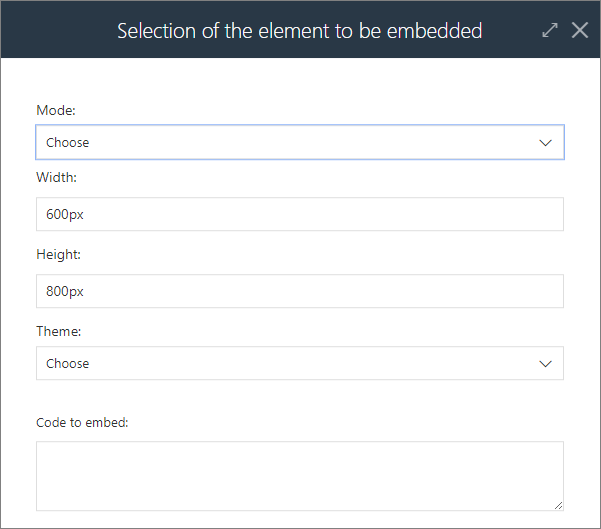
Embed
Selecting this option opens the Selection of the element to be embedded window.
 .
.
Through it, it is possible to generate an embed code for the selected application element, which will contain the <iframe> tag.
The generated code can then be embedded in another HTML document (on another site).
Analytics
Heatmap and Performance indicators are analytical functionalities that are available in Portal only from the application page. For more information, see the appropriate sections herein.