History
The functionality enables you to track how an instance progressed through a workflow and discover who processed it and how. With detailed information presented in a simple and clear manner, you can quickly learn which data was modified on the form, who added an attachment, when it was added, and which actions were triggered, to mention just a few examples. History consists of two views: Workflow history and Form history, and their visibility depends on the user's privileges.
To learn more about the History functionality, read the ARTICLE available in the WEBCON Community website.
User privileges
There are three levels of user privileges that determine views available in the History:
- Administrator – When clicking the gear icon, users with administrator privileges can view both the Workflow history and the full Form history, including all step transitions made by any user. In administrative mode, the data whose visibility was restricted (via the Access authorization setting) on the form by the application designer can also be accessed. Administrators additionally have access to detailed path transition logs, such as action logs and transition duration data.
- User with access to all Workflow instances – This user can view both the complete Workflow history and the Form history, except for instances marked as visible to administrators only.
- Other users – A user assigned to a task or granted access to a single instance can only view the Workflow history, where they see the status of the instance upon entering a step and any changes they made themselves (shown as before-and-after comparisons). They cannot see modifications made by other users.
Access to an instance History can be added or removed using the Add privileges / Remove privileges actions.
How to open instance History?
To access the functionality, click the History button (![]() ) on the right side of the form menu. Please note that this button is available only for instances which have been saved or transited through at least one path.
) on the right side of the form menu. Please note that this button is available only for instances which have been saved or transited through at least one path.

Managing the History window
Similar to the form window, the instance History window contains buttons that will help you in navigating within it or displaying specific information. Those buttons are available just above the table:

1. Instance history menu
The menu contains three buttons that facilitate navigation:
- Go back to instance – allows you to return to the instance form,
- Expand all – the button is active when some information has been hidden due to its large quantity. By pressing it you will be able to display all available information (the same effect is achieved after pressing the plus icon available between steps),
- Collapse all – the button becomes active once you press the Expand all button. It allows you to hide a part of information and thus decrease the amount of presented data.
2. History views
The History section contains two views and their availability depends on the user's privileges:
-
Workflow – This view is available to all users. It presents a graphical representation of the Workflow steps and transition paths.
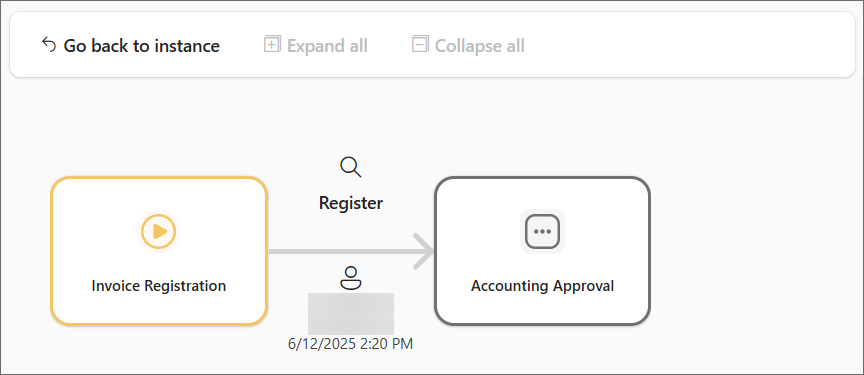
Users without extended privileges will see the following in this view:
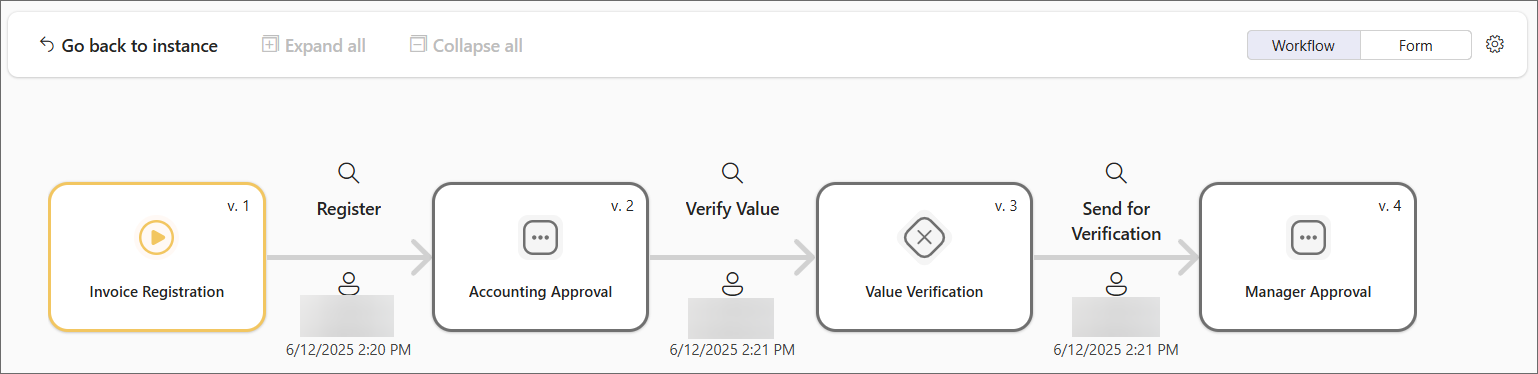
View for users with full privileges:
-
Form – This view is available only to users with access to all workflow instances and to administrators. It is presented in a table format and shows all changes made to the form by all users at each step of the workflow. Details of this view are provided below.
3. Admin button
By clicking the gear (![]() ) button, a user holding administrator privileges can also display the information that, for some reasons, has been hidden in History. This applies in particular to form fields whose availability on the form (and also in instance History) could have been restricted in Designer Studio.
) button, a user holding administrator privileges can also display the information that, for some reasons, has been hidden in History. This applies in particular to form fields whose availability on the form (and also in instance History) could have been restricted in Designer Studio.
Workflow
1. Step
The rectangles in the graphical view of the Workflow history indicate the step at which the instance was paused while progressing through the workflow. The appearance of the tiles is consistent with how steps are displayed in Studio during workflow design. If a task is assigned in a given step, clicking the step icon will display information about the user it is assigned to, as well as the task parallelism configuration.
2. Transition path
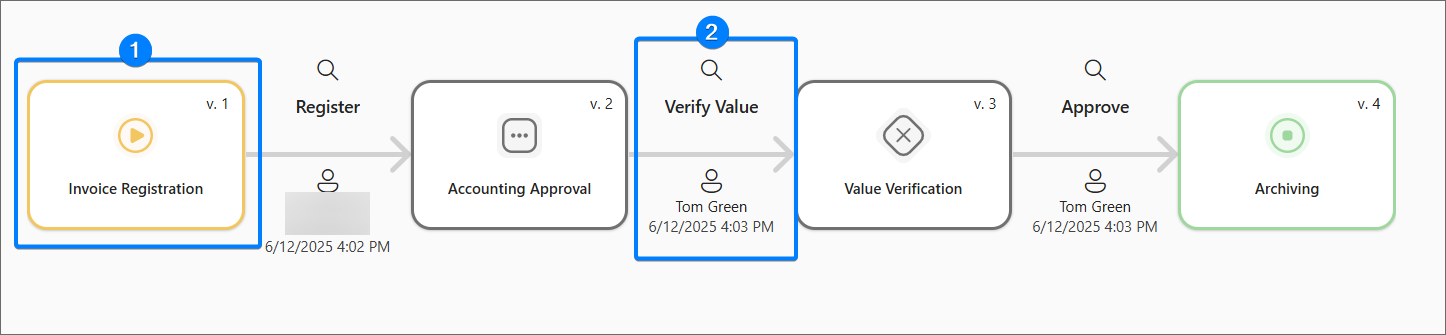
Above the arrows connecting the steps, you will find the names of the transition paths. Below each arrow, the user who completed the transition and the date of the transition are shown. Clicking the magnifying glass icon above a transition name allows the user to view a comparison of the two adjacent versions of the instance. This view hides Workflow control steps and version numbers. For users with limited privileges, the magnifying glass icon is only visible for transitions they performed themselves.
Form
The central part of the History window is occupied by the table and the timeline integrated in it (blue arrow above the proper table). This is the very place where you can familiarize yourself with information about instance, workflow, and executed operations.
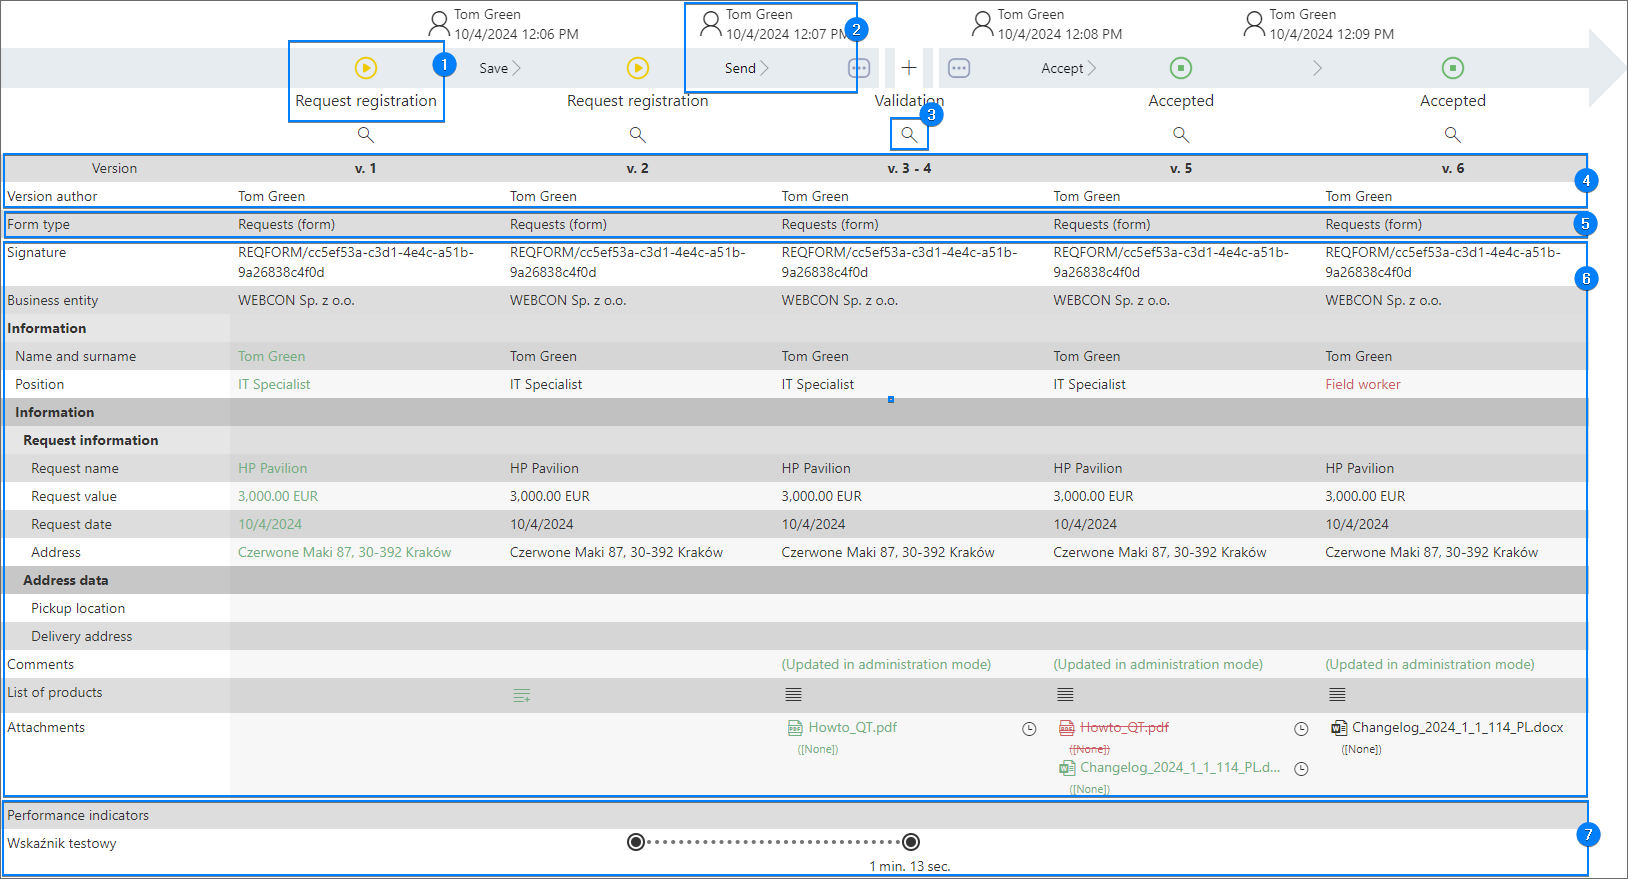
1. Step
The icon placed on the timeline indicates the step where instance stopped during its transition through the workflow. The icon appearance depends on the step type. If a task is to be executed in a given step, you can display information about the assigned user and the task parallelism by clicking the said icon.
Please note that steps also act as column headers. As a result, information provided in the rows below describe the instance state in a given step.
2. Path
Name of the path along with the information about the user who selected it and the data of the transition. By clicking the path name on the timeline you can display information about the user who chose the path, as well as possible actions and the date when they were triggered.
3. Magnifying glass
The button is available under each step presented on the timeline. Clicking it, allows you to display the instance form in its state in a given step.
4. Version
The row contains information about instance version, i.e. the state of the instance saved in the content database by transiting a path or clicking the Save button available in the form menu. In addition, you can view information about the person who saved the instance in the Version author row.
5. Form type
The Form type row includes information regarding the type of the form which was used in a given workflow step.
6. Form fields
The area groups form fields available on the form. This includes both the system fields, such as Comments and Attachments, as well as form fields created by user. It is worth remembering that unless a respective visibility restriction rules had been created, the area displays all form fields along with their values even if the application designer configured them as not visible on Field matrix.
The table does not present information about form fields belonging to the Data presentation type and certain form fields from the Specialized form fields group.
7. Indicators
The area contains information about performance indicators configured in Designer Studio. Those indicators are presented in a graphic form that depends on whether they have been calculated (two points connected by a dotted line) or the calculation is in progress (black arrow pointing to the right).
To learn more about performance indicators, read the ARTICLE available in the WEBCON Community website.
Designations of changes
Information presented in the instance History is often highlighted with a specific color or symbol to signalize changes made by the user. There are three following conventions applied:
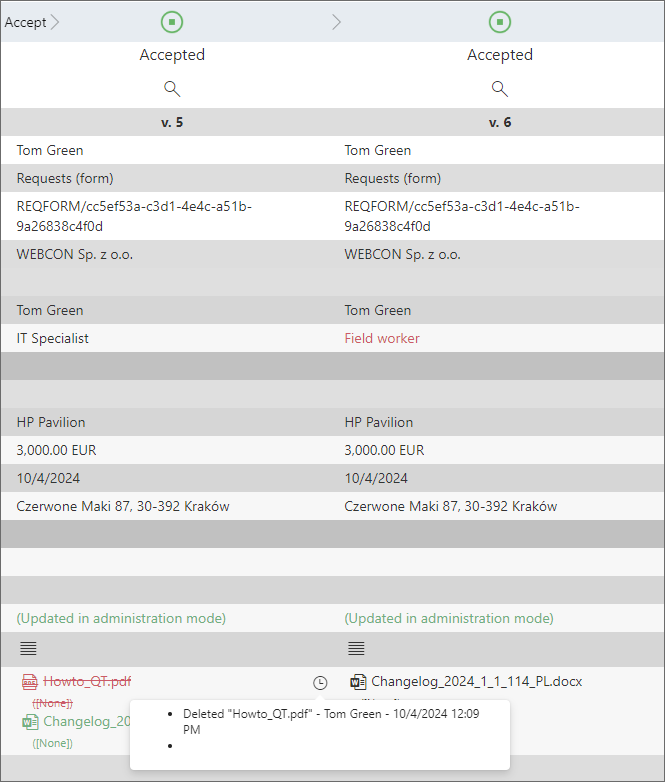
- green text (
 ) – highlights newly added information or element;
 - red text (
 ) – indicates information that replaced the previous information;
 - strikethrough red text (
 ) – informs that an attachment has been deleted or overwritten. If this is the case, a clock icon (
 ) is provided next the strikethrough text. By clicking it you can display detailed information about changes. If the changes were made to the attachment file, you can see the different historical versions of the file in a given step by clicking the magnifying glass icon (
 ) in the tooltip.
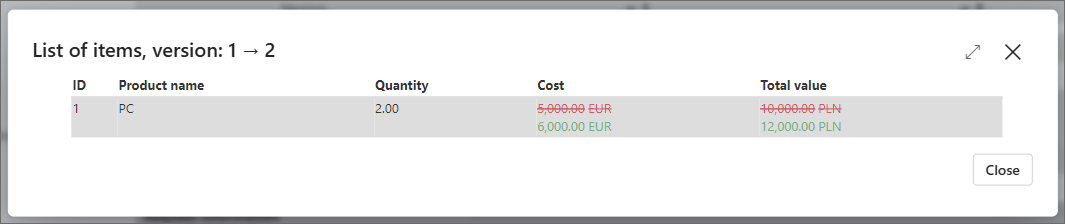
The designation of changes in History may vary depending on the type of form field. For example, when you make changes in the Item list form field, the icon color of this form field changes to green (regardless of whether information was added, changed, or deleted), and a plus sign appears in its corner (![]() ). By clicking the icon, you can open a window where all changes are displayed.
). By clicking the icon, you can open a window where all changes are displayed.